 how-to
How to Design a Multi-Level Deck Layout: Step-by-Step
Table of Contents
- Step 1: Measure Your Yard and Set Your Multi-Level Deck Goals
- Step 2: Draft Multi-Level Deck Plans That Fit the Slope
- Step 3: Use a Deck Layout Planner to Test Your Design
- Step 4: Get the Deck Design for a Sloped Yard Right
- Step 5: Plan Your Deck Stair Layout and Railings
- Step 6: Choose Materials and Check Permit Requirements
- Common Mistakes to Avoid When Designing a Multi-Level Deck
- Frequently Asked Questions
Last Updated: October 21, 2026
Step 1: Measure Your Yard and Set Your Multi-Level Deck Goals
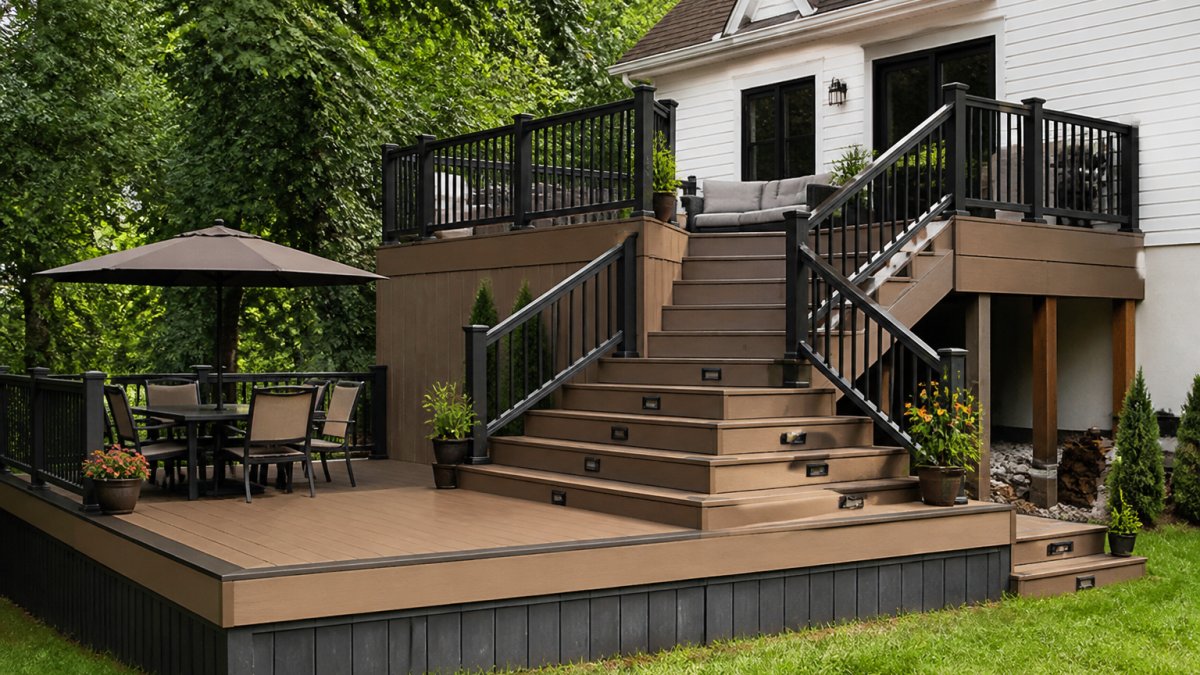
A multi-level deck is a wood platform built in two or more connected tiers, each at a different height, so a sloped yard becomes usable outdoor space instead of a hill you can't stand on. Designing one starts with a tape measure, not a sketchbook.
Here in Old Bridge, New Jersey, most backyards slope away from the house. That slope is the reason to build in levels at all.
Before you draw anything, walk the yard and write down:
- The slope drop from the house wall to the far property line
- Where the sun hits at 9 a.m. and 4 p.m.
- Door locations and their sill heights
- Trees, utility lines, and easements
- How you want to use each level: grilling, dining, lounging, a hot tub
Step 2: Draft Multi-Level Deck Plans That Fit the Slope
Good multi-level deck plans follow the grade instead of fighting it. You are not flattening the yard; you are stepping down with it.
Plotting Upper and Lower Platforms
Start with the upper platform. It should sit level with, or one step below, the interior floor. That keeps the indoor-to-outdoor transition smooth and keeps rain from running toward the house.
Then set the lower platform where the ground naturally drops. A common approach is to place the lower tier where the slope reaches roughly 60 to 90 centimeters (2 to 3 feet) below the upper level.
Sketch both platforms to scale on graph paper. Mark the posts, the stairs, and the traffic path from the back door to the yard.
Setting the Height Difference Between Levels
The gap between tiers decides your stair count. Each riser should be comfortable, and a short flight of two to four steps between levels feels natural.
Keep these rules in mind:
- Keep each level's drop consistent along its whole length
- Avoid single tall steps; they trip people
- Leave room for a landing if a flight exceeds a few risers
- Plan the lower tier so it never sits below grade
Step 3: Use a Deck Layout Planner to Test Your Design
A deck layout planner is a design tool, digital or paper, that lets you test platform sizes, stair positions, and railing runs before anyone buys lumber. It catches layout problems while changes are still free.
Free online planners let you drop in your dimensions and see the deck from above and in 3D. Graph paper and a pencil do the same job if you prefer.
Test at least three versions:
- Stairs centered on the upper deck
- Stairs pushed to one side
- A wraparound lower tier
What most guides miss is traffic flow. Watch how a guest walks from the kitchen door to the grill. If that path crosses three level changes, the layout is wrong.
Step 4: Get the Deck Design for a Sloped Yard Right
A deck design for a sloped yard succeeds when the frame works with the grade, not against it. That means longer posts on the low side, proper footing depth, and bracing that keeps the whole structure steady.
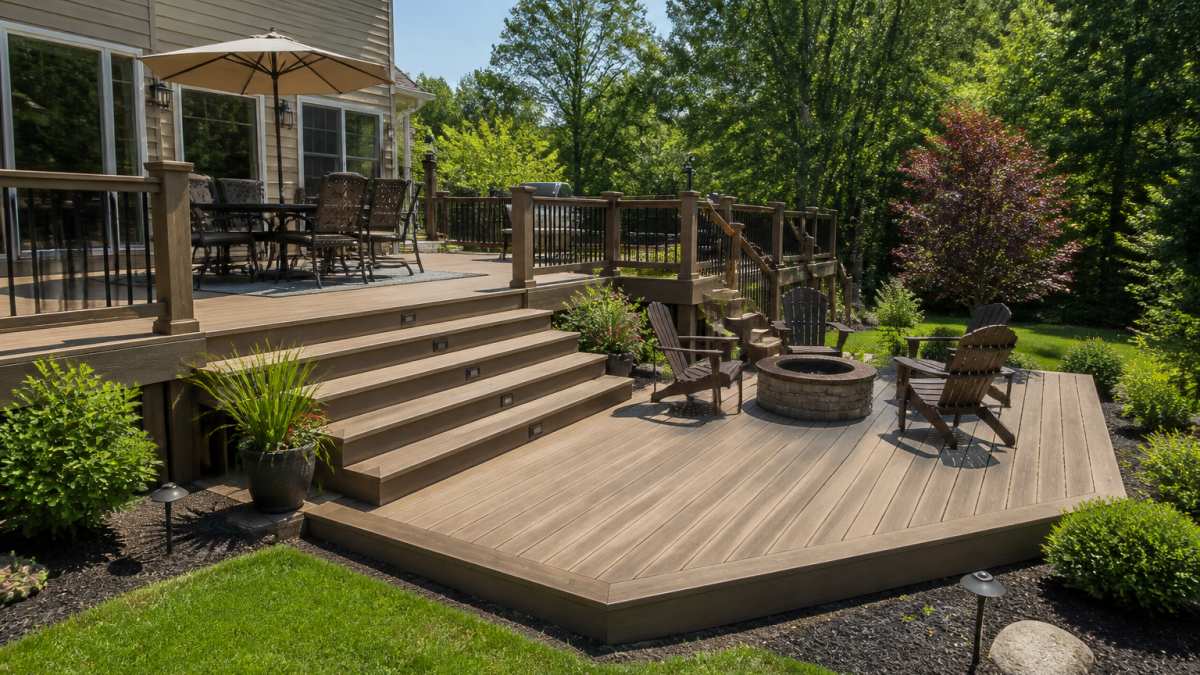
On a slope, the downhill side carries more load and more wind. Posts there need to be set deep and braced well. Frost depth matters in this region, so footings must go below the frost line.
Also plan drainage. Water pools at the base of a lower tier if the ground beneath it can't shed rain. Grade the soil away from the deck before the frame goes up.
If the slope is steep, a split-level design with a landing between tiers often works better than one tall flight. It also feels safer for older family members.
Step 5: Plan Your Deck Stair Layout and Railings
Your deck stair layout should match how people actually move through the space. Stairs belong where traffic naturally flows, not tucked into a corner for looks.
Stair Width, Rise, and Run
Stair dimensions follow building code, and the code matters for safety and permits. Standard practice in the U.S. calls for a maximum riser height of about 18 centimeters (7.25 inches) and a minimum tread depth of about 25 centimeters (10 inches). Confirm current figures with your local building department before you build, since rules vary by jurisdiction.
Width matters too. A stair narrower than about 90 centimeters (36 inches) feels tight when two people pass. Wider stairs cost more but read as generous and safe.
Railings are required on any deck higher than 30 inches above grade, and on stairs with more than a few risers. Plan posts so they don't block the stair opening.
- Keep riser height identical on every step
- Add a landing at the top and bottom of long flights
- Space railing posts so the rail feels solid
- Use graspable handrails on stairs
Step 6: Choose Materials and Check Permit Requirements
Material choice and permits are where a good design meets reality. Get both sorted before you order a single board.
Most decks in the U.S. need a building permit, and decks above a certain height or size often need engineered plans. Contact your local building department early. Ask what drawings they want and how long review takes.
For materials, real wood remains the classic choice for warmth and character. Pressure-treated lumber handles moisture well. Cedar and other naturally rot-resistant woods look better as they age. Composite boards need less upkeep but feel different underfoot.
We build with 100% real wood at PIONEER WOODWERX. If you're searching for a deck builder near me in Old Bridge, ask about wood species and finish options up front.
| Decision | Options | What to weigh |
|---|---|---|
| Decking | Pressure-treated, cedar, composite | Cost, upkeep, feel, lifespan |
| Railings | Wood, cable, metal | Safety code, view, maintenance |
| Stairs | Straight, L-shaped, landing | Slope, traffic, space |
| Footings | Concrete pier, helical | Frost depth, soil, slope |
Common Mistakes to Avoid When Designing a Multi-Level Deck
The biggest design errors show up before construction, not after. Catch them on paper.
- Ignoring the slope. Fighting the grade means tall posts and awkward stairs. Follow it instead.
- Too many levels. Three tiers on a small yard feels choppy. Two usually works better.
- Narrow stairs. Skimping on width makes the whole deck feel cramped.
- No landing. Long flights without a break are tiring and unsafe.
- Forgetting drainage. Water pooling under a lower tier rots wood fast.
- Skipping the permit. Unpermitted decks cause trouble at resale and can be ordered removed.
Designing a multi-level deck is a puzzle of slope, traffic, and safety, and getting it right takes experience with local grades and codes. That's where PIONEER WOODWERX comes in. As a veteran-owned general contractor serving Old Bridge and Central New Jersey, we build custom wood decks, outdoor living spaces, and full home renovations tailored to each property. We handle design, permits, and installation from the first consultation to the final board. Request a free consultation with PIONEER WOODWERX and turn your sloped yard into outdoor space your family will actually use.
Frequently Asked Questions
How do you plan a multi-level deck layout?
Start by measuring the yard and noting the slope and grade changes. Sketch two or three platforms that follow the terrain, then set the height difference between levels so stairs land comfortably. Test the design with a deck layout planner tool, confirm stair width and rise, and check local permit rules before ordering materials. A clear plan drawn to scale keeps the build on budget and avoids awkward level changes.
What is the best height difference between levels of a multi-level deck?
A drop of about 12 to 18 inches between platforms works well for most homes. That range lets you use two or three steps instead of a full staircase, which saves space and keeps sightlines open. Larger drops of 2 feet or more need a proper deck stair layout with railings on both sides. Match the level change to how you want to use each zone, such as dining above and a fire pit below.
How do you design a multi-level deck for a sloped yard?
Follow the natural grade rather than fighting it. Set the upper platform near the house door and step the lower platforms down the slope, using shorter posts on the high side and taller ones downhill. Keep each level within a comfortable step height, and plan drainage so water moves away from the house. A deck design for a sloped yard should also account for frost depth and footing placement on uneven ground.
Do I need a permit to build a deck in Old Bridge, New Jersey?
Most decks in New Jersey require a construction permit from the local building department, and Old Bridge is no exception. Decks attached to a house, raised above a certain height, or with stairs and railings typically need plan review and inspections. Rules cover footing depth, railing height, and stair dimensions. Confirm the current requirements with the township before you finalize multi-level deck plans, since approval affects your timeline.