 listicle
Best Bathroom Renovation Tips for Seniors
Table of Contents
- Plan Your Budget and Timeline Before Starting
- How to Make a Bathroom Wheelchair Accessible
- Best Grab Bar Placement for Seniors
- Non-Slip Bathroom Flooring Options
- ADA Bathroom Design Standards for Homes
- Essential Lighting and Temperature Control
- Common Bathroom Renovation Mistakes to Avoid
- Frequently Asked Questions
Last Updated: October 4, 2026
Creating a safe, functional bathroom for seniors requires thoughtful planning and attention to accessibility details. At PIONEER WOODWERX, we've helped families in Old Bridge and throughout Central New Jersey design bathrooms that maintain independence while preventing falls and injuries. The best bathroom renovation tips for seniors focus on universal design principles that work for everyone, not just those with mobility challenges.
This guide covers the essential modifications that transform a standard bathroom into a space where aging adults can bathe, use the toilet, and manage daily routines with confidence. We'll walk you through planning, accessibility features, safety upgrades, and the design standards that matter most.
Plan Your Budget and Timeline Before Starting
Before selecting fixtures or materials, establish realistic expectations about scope and schedule. A bathroom renovation for aging-in-place modifications varies in duration, depending on structural changes and permit requirements in your area. Old Bridge and other municipalities in New Jersey require permits for plumbing and electrical work, which adds 1 to 2 weeks to your timeline.
Start by identifying which modifications matter most. Do you need a curbless shower, grab bars, better lighting, or all three? Prioritizing helps you allocate resources where they'll have the greatest impact on safety and usability.
Work with a contractor experienced in aging-in-place remodeling. They'll identify hidden costs, like reinforcing walls for grab bar anchoring or upgrading ventilation to prevent moisture damage, that DIY estimates often miss. A professional assessment prevents budget surprises later.
Document your current bathroom's dimensions and take photos of existing fixtures. This reference helps contractors provide accurate estimates and prevents miscommunication about what's actually involved in the work.
How to Make a Bathroom Wheelchair Accessible
Wheelchair accessibility requires clear floor space, door modifications, and vanity placement that accommodates seated use. The best bathroom renovation tips for seniors include these wheelchair-specific adjustments, even if mobility aids aren't needed immediately, universal design principles benefit everyone.
Door Width and Threshold Modifications
Standard interior doors are 32 inches wide. Wheelchair accessibility requires a minimum of 32 inches of clear opening width, which means installing a door that's 36 inches wide. Removing the threshold, the raised edge at the doorway, eliminates a tripping hazard and allows smooth passage for walkers and wheelchairs.
In Old Bridge homes with older construction, doorframes may not accommodate a wider door without structural changes. A contractor can assess whether the wall can be modified or if a pocket door (which slides into the wall) is a better solution. Pocket doors save space and improve accessibility in tight bathrooms.
The floor on both sides of the door should be level. If your bathroom sits higher or lower than the hallway, a sloped transition ramp prevents tripping and makes wheelchair passage easier.
Vanity and Sink Clearance
A standard vanity is 30 to 36 inches high. For wheelchair users, the sink should be mounted at 34 inches maximum, with knee clearance underneath, at least 27 inches deep and 19 inches wide. This allows someone seated to roll under the sink to wash hands and face.
Wall-mounted sinks with exposed plumbing underneath provide this clearance. Pedestal sinks, while attractive, don't allow wheelchair access. If you prefer a traditional vanity, select one with an open knee space and insulate hot water pipes to prevent burns.
Faucets should have lever handles or touchless activation. Knob handles are difficult for people with arthritis or limited grip strength. A single-lever faucet is easier to operate than separate hot and cold knobs.
Best Grab Bar Placement for Seniors
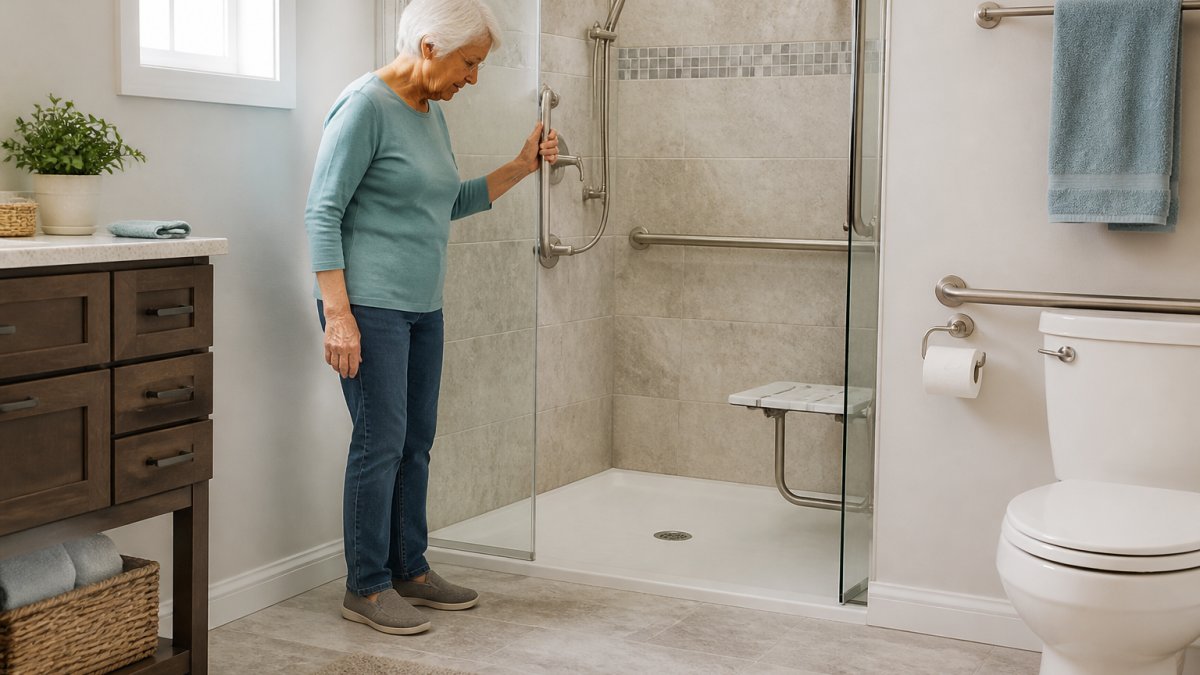
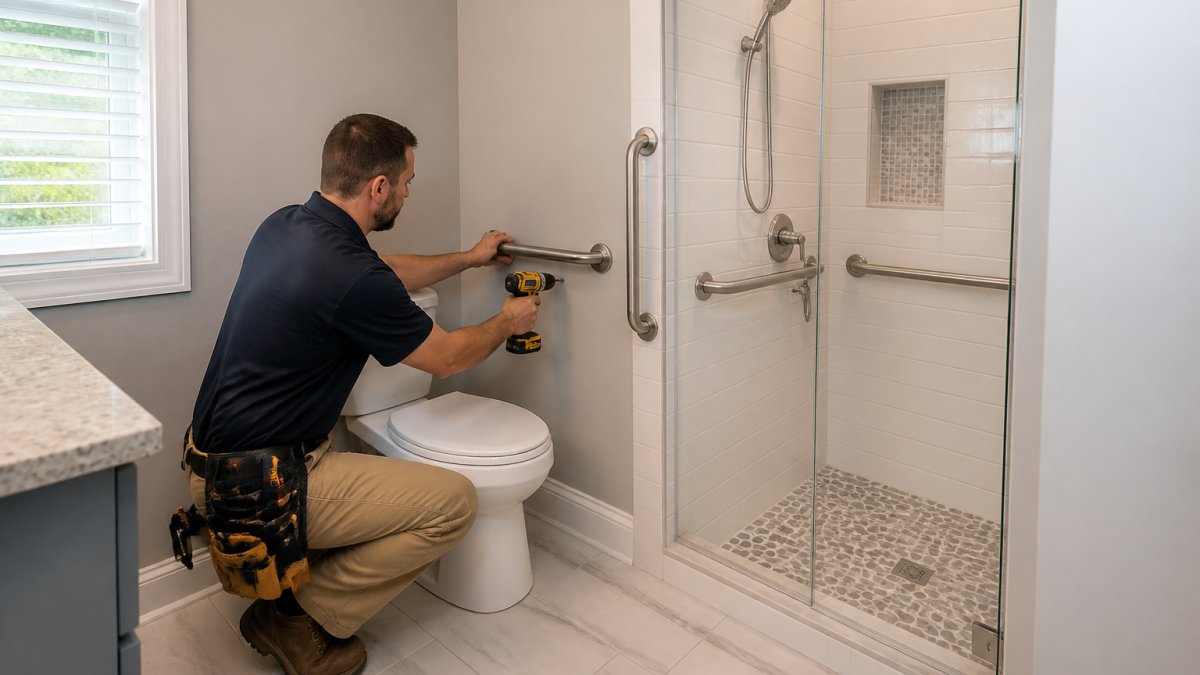
Grab bars are the single most important safety feature in a senior bathroom. Proper placement prevents falls during the highest-risk moments: transferring on and off the toilet, entering and exiting the shower, and moving around the room.
Toilet Area Installation
Install horizontal grab bars on both sides of the toilet, 33 to 36 inches above the floor. Bars should extend 12 inches beyond the toilet's centerline on each side, giving users something to grip while lowering themselves onto the seat and pushing back up.
A vertical bar on the wall behind the toilet provides additional support for balance. This bar should be 12 inches from the wall and positioned at a comfortable height for your specific user, typically 36 to 42 inches from the floor.
All grab bars must be anchored to wall studs or blocking installed specifically for that purpose. Surface-mounted bars on drywall alone will fail under weight.
Shower and Tub Safety Bars
For walk-in showers or curbless designs, install a horizontal grab bar at 36 inches above the floor on the wall where the user enters.
If your bathroom includes a traditional tub, bars should run along the long edge of the tub at 33 to 36 inches high. Add a vertical bar at the tub's foot end to help users pull themselves up.
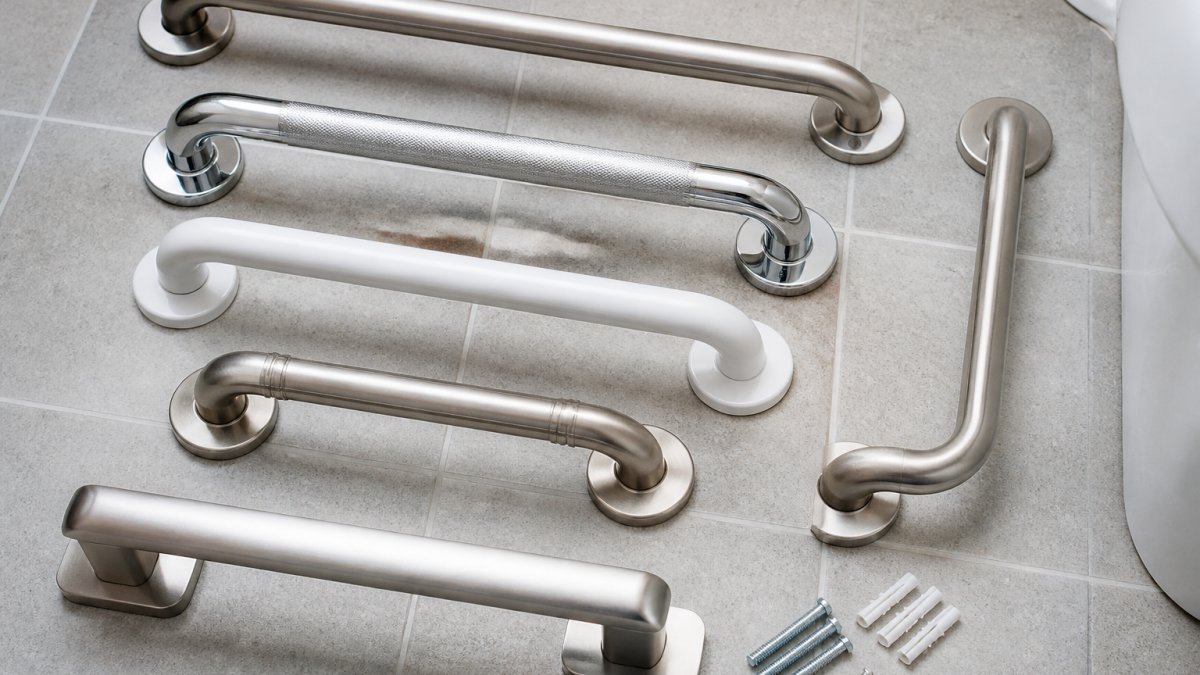
The best bathroom renovation tips for seniors emphasize that grab bars are functional, not decorative. Choose bars with a 1.25 to 1.5-inch diameter, comfortable to grip without requiring excessive hand strength.
Non-Slip Bathroom Flooring Options
Wet bathroom floors are slippery for everyone, but seniors with balance issues face heightened fall risk. Non-slip flooring is essential for aging-in-place bathrooms.
Porcelain tile with a textured or matte finish provides good traction when wet. Avoid glossy finishes, which become dangerously slick when moisture is present.
Natural stone like slate or limestone offers inherent texture but requires regular sealing to prevent water damage.
Vinyl flooring with a textured surface is budget-friendly, water-resistant, and easy to clean.
Heated flooring systems warm the bathroom and improve comfort. The best bathroom renovation tips for seniors often include radiant floor heating installed under tile or stone.
Avoid throw rugs, which create tripping hazards. If you use bath mats, choose ones with non-slip backing and secure them firmly to the floor.
ADA Bathroom Design Standards for Homes
The Americans with Disabilities Act (ADA) establishes accessibility standards for public buildings. While residential bathrooms aren't legally required to meet ADA standards, following them creates safer spaces for aging adults and visitors with disabilities.
Space Requirements and Layout
ADA standards require a turning radius of 60 inches, enough space for a wheelchair to rotate 360 degrees. This means your bathroom needs a circular area at least 5 feet in diameter with no obstructions. In smaller bathrooms, this may require relocating fixtures or enlarging the room.
Clear floor space in front of the toilet should be at least 48 inches wide and 60 inches deep. This allows someone using a walker or wheelchair to approach and transfer safely. Similarly, the shower or tub area needs 60 inches of clear space in front of the entrance.
Doorways should provide 32 inches of clear opening width, as mentioned earlier. Hallways leading to the bathroom should be at least 36 inches wide to accommodate wheelchairs and walkers.
Fixture Height and Accessibility
According to ADA Accessibility Guidelines for Buildings and Facilities, toilet seats should be mounted 17 to 19 inches above the floor.
Sinks mounted at 34 inches maximum height (measured to the rim) allow wheelchair users to access them. The sink should have knee clearance of at least 27 inches deep and 19 inches wide underneath.
Shower controls should be located 38 to 48 inches above the floor, reachable from a seated position. Lever handles are required; knobs are not ADA-compliant because they're difficult for people with limited grip strength.
The best bathroom renovation tips for seniors emphasize that these standards create functional spaces for multiple users. A bathroom designed to ADA standards works well for visitors of all ages and abilities, not just the primary user.
Essential Lighting and Temperature Control
Poor lighting increases fall risk and makes grooming difficult. Inadequate heating and ventilation create moisture problems that damage the bathroom and promote mold growth.
Task lighting, bright, focused light over the sink and toilet, helps seniors see clearly for grooming and personal care. Install lights on both sides of the mirror to eliminate shadows on the face.
Overhead lighting should be dimmable, allowing users to adjust brightness for comfort. Bright light at night can be disorienting; dimmer switches let people use lower settings for nighttime bathroom visits.
Motion-sensor lights or voice-activated systems eliminate the need to find a switch in the dark. The Lutron Caseta Smart Lighting system allows voice control through Alexa or Google Assistant, making bathroom lighting accessible without reaching for wall switches.
Temperature control matters for comfort and safety. Bathrooms should be adequately heated for comfort. Cold bathrooms encourage quick, rushed movements that increase fall risk.
Ventilation prevents moisture accumulation, which damages walls, promotes mold, and creates slippery surfaces. Install an exhaust fan rated for your bathroom's square footage.
Common Bathroom Renovation Mistakes to Avoid
Many families make decisions during bathroom renovations that seem logical at the time but create problems later.
Underestimating wall reinforcement needs. Grab bars require solid anchoring. If walls aren't reinforced with blocking behind the drywall, bars will fail.
Ignoring ventilation. Inadequate exhaust fans lead to moisture damage, mold growth, and slippery surfaces.
Installing grab bars in the wrong locations. Bars placed for appearance rather than function don't prevent falls.
Selecting slippery flooring. Glossy tile and smooth surfaces look elegant but are dangerous when wet.
Failing to plan for future needs. What works today may not work in five years if mobility declines further.
Rushing the permit process. Old Bridge and other New Jersey municipalities require permits for plumbing and electrical work.
Bathroom renovations for seniors require careful planning and professional execution. Our team handles permits, coordinates with inspectors, and ensures every grab bar, fixture, and accessibility feature meets current standards. Request a free consultation to discuss your specific needs and learn how we can transform your bathroom into a safe, functional space that supports aging in place.
Frequently Asked Questions
What are the most important safety features for a senior-friendly bathroom?
The essentials include grab bars installed at correct height and spacing, non-slip flooring, a curbless shower or walk-in tub, adequate task lighting, and a thermostatic valve to prevent scalding. ADA bathroom design standards guide proper placement of these features. A professional assessment ensures all elements work together to reduce fall risk and improve independence.
How do I choose between a walk-in tub and a curbless shower for bathroom renovation?
Walk-in tubs offer a sealed entry door and hydrotherapy jets, ideal if you prefer bathing and need extra support. Curbless showers provide easier wheelchair access and faster water drainage, better for those with mobility challenges. Consider your mobility level, transfer preferences, and available space. Both can be designed with grab bars and non-slip flooring for maximum safety.
What are ADA bathroom design standards for homes, and do I need to follow them?
ADA standards specify minimum space (turning radius of 60 inches), fixture heights (sink rim at 34 inches, toilet seat at 17-19 inches), and grab bar placement. While residential bathrooms aren't legally required to meet full ADA compliance, following these standards ensures universal design and accessibility. They're especially important for aging-in-place modifications to maintain independence and safety.
What is the best grab bar placement for seniors in a bathroom?
Install vertical bars 33-36 inches from the floor on the wall beside the toilet, and horizontal bars 33-36 inches high in the shower or tub area. Add a secondary bar 8-10 inches above the primary one for additional support. All bars must be mounted into wall studs or backing plates for structural integrity. Professional installation ensures safety.
What are common bathroom renovation mistakes to avoid when planning for seniors?
Avoid poor lighting that creates shadows or glare, inadequate grab bar spacing that limits support, flooring that's slippery when wet, and fixtures placed at heights that require reaching or bending. Don't skip professional installation for safety features. Overlooking ventilation leads to moisture damage and mold. Failing to plan for future mobility needs wastes money on renovations that won't age well with you.