 How-to
How to Plan a Basement Renovation: 7 Essential Steps
Last Updated: October 26, 2026
Quick Summary
Planning a basement renovation starts with defining the room's purpose, then assessing existing conditions and usable space. Next, handle waterproofing, confirm permit requirements, sequence the phases, choose moisture-resistant flooring, and set a realistic budget before selecting finishes.
- Write down your top two goals, since chasing four or five at once stretches budget and schedule.
- Measure to the lowest obstruction, because ducts and beams often hang below the ceiling.
- Waterproofing must be finished before drywall goes up, or walls come out later.
- Rough inspections must pass before drywall, so build the inspection schedule into the calendar.
- Luxury vinyl plank, porcelain tile, and engineered vinyl over a vapor barrier resist basement moisture best.
Table of Contents
- Step 1: Define the Basement's Purpose and Functional Needs
- Step 2: Assess Existing Conditions and Usable Space
- Step 3: Learn How to Waterproof a Basement Before Finishing
- Step 4: Check Basement Renovation Permit Requirements in New Jersey
- Step 5: Plan the Basement Remodeling Timeline and Phases
- Step 6: Choose the Best Basement Flooring Options for Moisture Resistance
- Step 7: Set a Realistic Budget and Decide DIY Versus Professional Work
- Schedule Your Basement Renovation Consultation
- Frequently Asked Questions
Step 1: Define the Basement's Purpose and Functional Needs
Basement renovation planning starts with one question: what will this room actually do for your family? Answer that first, and every later decision gets easier.
A home gym, guest suite, and playroom need very different layouts, wiring, and plumbing.
Common goals for a basement include:
- A family room for movie nights and gatherings
- A guest bedroom with a full bathroom
- A home office away from household noise
- A playroom that keeps toys out of living spaces
- A wet bar or kitchenette for entertaining
Write down your top two goals. Chasing four or five at once stretches the budget and the schedule.
Match the Layout to How Your Family Will Use the Space
Walk through your daily routines. If movie nights matter most, the TV wall and seating distance drive the floor plan. If an aging parent will use the space, plan for wider doorways, a curbless shower, and good stair lighting. Aging-in-place modifications are a specialty of ours.
Watch out: Moving a bathroom wall after framing starts costs far more than deciding its location on paper.
Step 2: Assess Existing Conditions and Usable Space
Measure the space before you dream about finishes. Record ceiling height, room dimensions, window locations, and where the furnace, water heater, and electrical panel sit. Those mechanicals can't simply be moved, and they eat into usable square footage.
Then check the structure: cracks in foundation walls, sagging floor joists, and signs of past water damage. A structural assessment from a licensed professional is worth the fee before you commit to a design. Be honest about headroom too, ductwork and beams often hang lower than the ceiling, so measure to the lowest obstruction. Document everything with photos and notes; you'll hand this file to every contractor who bids, and it keeps estimates comparable.
Step 3: Learn How to Waterproof a Basement Before Finishing
Water is the number one enemy of a finished basement. Handle moisture before drywall goes up, or you'll be tearing out walls later. Waterproofing seals the foundation and manages water so it never reaches your finished space, combining exterior grading, interior drainage, and vapor control.
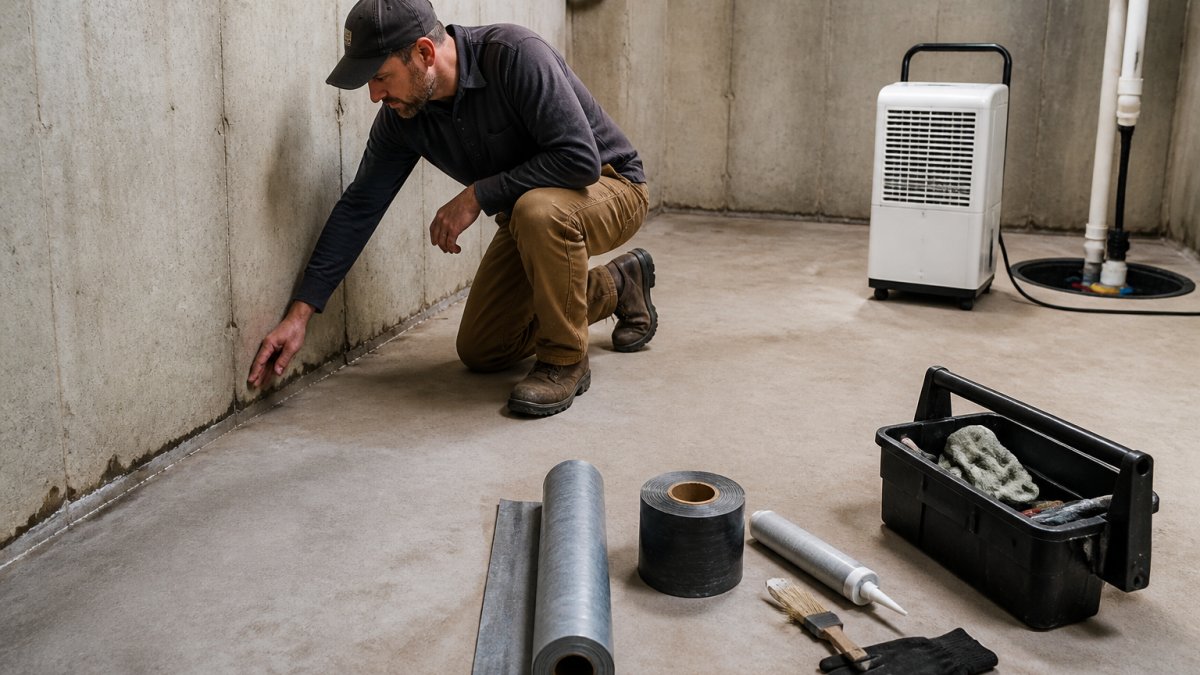
The U.S. Environmental Protection Agency's guide to moisture control is a solid starting point for understanding how water moves through a home.
Drainage, Sump Pumps, and Foundation Sealing
Three systems do most of the work:
- Exterior grading: Soil should slope away from the foundation on all sides.
- Gutters and downspouts: Route roof water several feet from the house.
- Interior drainage: A perimeter drain leading to a sump pump handles water that gets in anyway.
For the full method, see our guide on how to waterproof a basement before finishing. It walks through sealing, drainage, and testing in order.
Step 4: Check Basement Renovation Permit Requirements in New Jersey
Confirm permit requirements with your local construction office before starting work.
What New Jersey Reviewers Typically Look For
Confirm applicable requirements with your local construction official:
- Ceiling height: Habitable rooms generally need a minimum ceiling height, and beams, ducts, and soffits count against it. Measure to the lowest obstruction, not the slab-to-joist dimension.
- Egress: Any sleeping room needs a compliant emergency escape opening. A window well with a ladder or steps is common below grade, and the opening size and sill height matter.
- Stair safety: Handrails, guardrails, headroom, and tread dimensions on the basement stair are inspected, and older stairs often fail current standards.
- Smoke and carbon monoxide alarms: Placement and interconnection requirements apply to new sleeping rooms and altered spaces.
- Fire separation: Furnace rooms, water heater closets, and attached garages often need separation from finished space.
- Bathroom ventilation: A full bath needs mechanical exhaust vented to the exterior, not into the basement.
The Permit Questions to Ask Your Local Construction Office
Call the construction office in the town where the home sits. Ask and record the answers:
- Which permits does this scope need, building, electrical, plumbing, fire, or a combination?
- What inspections happen at each stage, and how much notice do you need to schedule them?
- Does the town require sealed architectural or engineering drawings for a basement finish, or are plan sketches enough?
- Are there zoning limits on the finished space, such as bedroom count or lot coverage for an egress window well?
- What is the current review turnaround, and does it change by season?
Those answers shape your timeline and budget more than any finish selection. Build the inspection schedule into the project calendar before demolition starts.
Documentation to Have Ready Before You Apply
Assemble a dimensioned floor plan showing rooms, egress openings, and mechanical locations; a scope-of-work narrative; and any other documents requested by your local construction office.
For how these requirements fit the wider build sequence, see our finished basement planning guide for New Jersey.
Step 5: Plan the Basement Remodeling Timeline and Phases
The sequence matters, skipping a phase can mean later trades redo work.
Rough-In, Framing, and Inspection Sequence
- Waterproofing and moisture control
- Demolition and site prep
- Framing and insulation
- Plumbing rough-in and electrical rough-in
- Rough inspections
- Drywall, taping, and paint
- Flooring and fixtures
- Final inspections and punch list
Plumbing rough-in means running pipes inside the walls before drywall closes them in. It must happen before inspections, and inspections must pass before drywall.
For a deeper look at keeping phases on schedule, read how to avoid basement remodeling delays.
| Phase | Typical Duration | What Must Be Done First |
|---|---|---|
| Waterproofing | 1-3 days | Condition assessment |
| Framing and insulation | 3-5 days | Layout approved |
| Plumbing and electrical rough-in | 3-7 days | Framing complete |
| Rough inspections | 1-3 days | Rough-in passed |
| Drywall and paint | 5-8 days | Inspections signed off |
| Flooring and fixtures | 3-5 days | Paint dry |
| Final inspection | 1-2 days | All trades complete |
Step 6: Choose the Best Basement Flooring Options for Moisture Resistance
The best basement flooring options for moisture resistance are luxury vinyl plank, ceramic or porcelain tile, and engineered vinyl over a vapor barrier. Carpet works only in reliably dry spaces.
Concrete below grade wicks moisture from the soil, so the floor choice is really a moisture decision. Here's how the main options compare:
- Luxury vinyl plank: Water-resistant, warm underfoot, easy to install over a vapor barrier.
- Porcelain tile: Fully waterproof and durable, but cold and harder underfoot.
- Engineered hardwood: Looks great but needs a dry, well-sealed slab.
- Carpet tiles: Comfortable and replaceable in sections, best for dry rooms.
For a side-by-side breakdown, see our list of the best basement flooring options for moisture control. It compares cost, comfort, and water tolerance.
Watch out: Gluing down solid hardwood directly on a basement slab traps moisture and causes cupping. Always test the slab first.
Step 7: Set a Realistic Budget and Decide DIY Versus Professional Work
Set the budget before you pick finishes, not after. A basement budget is shaped by multiple cost drivers.
The Cost Drivers, in Order of Impact
Consider these potential project components when defining your scope:
- Moisture control and waterproofing: Interior drainage, sump pump work, vapor barriers, and any foundation sealing.
- Bathroom or wet bar plumbing: Adding a bathroom means breaking concrete for drain lines, venting, and a new fixture set.
- Egress window and window well: Cutting a foundation wall and installing a compliant well is a specialty job with its own cost.
- Electrical and lighting: Panel capacity, new circuits, recessed lighting, and outlet count. An older panel may need an upgrade before any of it starts.
- Framing, insulation, and drywall: Driven by wall length, ceiling height, and how many rooms you carve out.
- Flooring and finishes: The most visible line and the easiest to flex up or down.
- Permits and inspections: Fees scale with scope and trade count.
Consider requesting a written scope that identifies the work included in the project.
Build a Contingency Line
Below-grade conditions can include hidden moisture, outdated wiring, or other unexpected issues.
DIY Versus Professional: Where the Line Sits
Some tasks may be suitable for a homeowner, while others may call for professional help.
Reasonable DIY: paint, trim, simple demolition, and hauling debris.
Usually professional:
- Electrical: New circuits, panel work, and anything requiring an inspection.
- Plumbing and gas: Drain lines, venting, water supply, and any gas appliance connection.
- Structural work: Cutting a foundation for egress, altering beams, or addressing joist issues needs an engineer's input and a qualified installer.
- Waterproofing and drainage: Interior drain systems and sump installations are specialty work, and a failed system means tearing out finished walls.
How to Compare Contractor Bids on Equivalent Work
Before you sign:
- Get a written scope of work that lists every task, material, and allowance, so two bids describe the same job.
- Verify the license and insurance, ask for the New Jersey contractor registration number, general liability coverage, and workers' compensation certificates.
- Ask who pulls the permits and who schedules inspections. The answer should be the contractor, not you.
- Ask for references from basement projects finished in the last year and call them.
- Compare bids line by line, not by total. A low total often means a missing waterproofing line or an allowance that will grow.
- Confirm the change-order process in writing, how changes are priced and approved before work proceeds.
A scope-of-work checklist and a side-by-side bid comparison turn a stressful decision into a straightforward one. For a look at our full renovation services, visit our renovations page.
Schedule Your Basement Renovation Consultation
The gap between a basement you avoid and one your family lives in comes down to planning done in the right order. Moisture first, permits second, finishes last.
PIONEER WOODWERX is a veteran-owned general contractor serving Central New Jersey. We specialize in basement remodeling and provide dependable project management and quality craftsmanship. If you're searching for a basement remodeling contractor in Middlesex or Monmouth County, we'd be glad to discuss your project.
Get started with PIONEER WOODWERX and turn your unfinished basement into the room your family uses most. Request a free consultation today.
Frequently Asked Questions
How do I start finishing my basement in New Jersey?
Start by defining what the space needs to do: a family room, guest suite, home office, or wet bar each changes the layout, plumbing, and electrical plan. Then assess existing conditions, including moisture, ceiling height, and structural elements. Before work begins, confirm applicable requirements with your local construction office. A written scope and budget should come before you hire anyone.
Do I need a building permit for a basement renovation in Old Bridge?
Confirm applicable permit requirements with Old Bridge's construction office before work begins.
What is the most expensive part of finishing a basement?
Project scope can include moisture control, structural work, plumbing, egress windows, finishes, electrical work, and HVAC. Request a quote based on the work planned.
How long does a basement remodeling timeline usually take?
Project duration depends on the scope and other project-specific factors. Ask your contractor for a schedule based on the planned work.