 How-to
How Do You Make a Bathroom Wheelchair Accessible?
Last Updated: October 27, 2026
Quick Summary
Start by measuring the room, since a wheelchair accessible bathroom depends on clear space more than materials. Check that the doorway clear opening is at least 32 inches, allow a 60-inch turning circle, and keep 60 by 56 inches of clear floor space at the toilet. Then add a roll-in shower, grab bars anchored into solid blocking, and reachable controls.
- Measure the clear door opening, not the full door width, and aim for 32 inches or more.
- Keep a 60-inch diameter turning circle free so the chair can rotate to face each fixture.
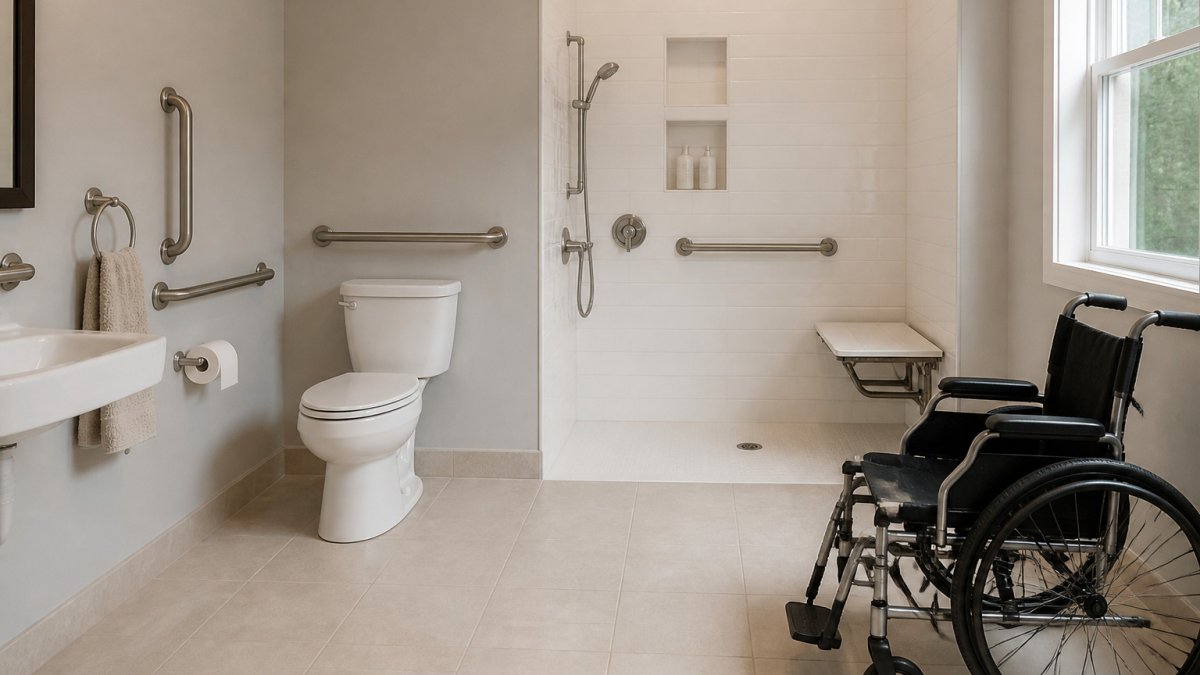
- Use a curbless, sloped shower floor with a drain and slip-resistant tile for roll-in access.
- Anchor grab bars into solid blocking inside the wall, since drywall alone cannot hold weight.
- Confirm local building code requirements with your municipal building department before finalizing the layout.
Table of Contents
- Measure the Room and Plan Your Layout
- Set the Right Wheelchair-Accessible Bathroom Dimensions
- Create a Roll-In Shower for Wheelchair Access
- Place Grab Bars Where They Will Actually Be Used
- Adjust the Toilet, Vanity, and Storage for Wheelchair Use
- Plan Your Accessible Bathroom Remodel With Pioneer Woodwerx
- Frequently Asked Questions
Making a bathroom wheelchair accessible starts with measurements, not materials. Before you buy a grab bar or pick out tile, you need to know how much room a wheelchair needs and where the obstacles are.
Most bathrooms were not built for wheelchair users. The doorway is too narrow, the tub blocks the path, and the vanity leaves no room to turn.
Measure the Room and Plan Your Layout
Measure the entire room, including the door, walls, and every fixture, and write down each number. For a broader overview of sequencing home modifications, see how to plan aging in place modifications.
A wheelchair user needs enough space to enter, turn, and transfer to each fixture (Chapter 3: Clear Floor or Ground Space and Turning Space). Your layout plan should answer three questions: Can a wheelchair get through the door, turn around inside, and reach the toilet, shower, and sink?
Doorway width and wheelchair clearance
The doorway is often the first problem to solve. Measure the clear opening, the space between the door and the frame when open, not the full door width.
- Many standard interior doors have a clear opening near 28 inches, which can be tight for a wheelchair.
- A wider door, often 32 inches or more, gives a wheelchair much easier access.
- Check the swing direction too. A door that swings into the room takes up floor space you need for turning.
Sliding or pocket doors can free up room when a swing-out door blocks the path.
Clear floor space and turning room
A wheelchair needs a clear floor area to turn around. Measure the open space in front of the toilet, sink, and shower. Keep that space free of the door swing, the vanity, and any cabinet doors that open into the path.
- Look for a clear floor area that allows a wheelchair to turn, usually a circle with enough diameter for the chair to rotate.
- Keep a clear path in front of each fixture so the user can approach it straight on.
- Note any tight, awkward turns and plan to move a fixture or change the door.
Set the Right Wheelchair-Accessible Bathroom Dimensions
Dimensions are where many DIY plans go wrong. Compare your room sketch to the clearances a wheelchair user needs, a few inches often decide whether a wheelchair accessible bathroom works. To see how these figures differ from residential standards, read ADA bathroom requirements vs residential standards.
The numbers below are widely used planning targets in the United States. They are not a substitute for your local building code, but they give a realistic starting point before you talk to a contractor.
| Area | Planning target | Why it matters |
|---|---|---|
| Doorway clear opening | 32 inches minimum; 34-36 inches is more comfortable | A chair must pass without scraping knuckles or wheels |
| Interior turning space | A 60-inch diameter circle, or a T-shaped space with a 36-inch arm | Lets the chair rotate to face each fixture |
| Clear floor space at toilet | 60 inches wide by 56 inches deep | Room for a side or diagonal transfer |
| Space beside toilet | 30 inches minimum from the toilet centerline to the nearest wall or fixture | Side-transfer clearance |
| Toilet seat height | 17-19 inches from the floor | Matches most wheelchair seat heights for a level transfer |
| Knee clearance under sink | 27 inches high, 30 inches wide, 11-25 inches deep | Lets the chair pull under the sink |
| Shower entry | Zero threshold, or no more than 1/2 inch with a beveled edge | Roll-in access without a lift |
| Shower seat | 17-19 inches high, at least 15 inches deep | Stable seated position |
| Grab bar height | 33-36 inches above the floor | Reachable from a seated position |
| Controls and outlets | 15-48 inches above the floor | Reachable without standing |
A step-by-step measuring workflow
Before choosing a layout or hiring anyone, work through these steps:
- Measure the door clear opening with the door open 90 degrees, between the face of the door and the strike-side jamb, not the door slab width.
- Measure the room's inside dimensions wall to wall at floor level, then again at 30 and 60 inches up, because walls are rarely plumb.
- Mark fixture centerlines for the toilet, sink, and tub or shower on your sketch.
- Measure the clear floor space in front of each fixture, subtracting the door swing and any cabinet doors that open into the path.
- Test the turning circle with a tape measure or chalk line in a 60-inch circle on the floor. If it does not fit, note which fixture blocks it.
- Measure transfer space on both sides of the toilet so you know which side offers more room.
- Check reach ranges by marking 15 and 48 inches on the wall next to the toilet, sink, and shower.
Check local requirements before you finalize
Residential bathrooms are generally governed by the adopted building code in your jurisdiction, not automatically by the Americans with Disabilities Act (ADA), which applies to public accommodations and commercial facilities (Businesses That Are Open to the Public). The ADA Standards contain useful reference dimensions, the 60-inch turning circle and 32-inch door clear width come from that document, but a private home is usually regulated by the local residential code and any state or municipal amendments.
In New Jersey, residential work falls under the Uniform Construction Code, administered through the Department of Community Affairs and enforced by your local construction official. Before finalizing a layout:
- Call your municipal building department and ask which code edition is in force and whether a permit is required for your scope.
- Ask whether the project triggers any accessibility requirements, especially if a resident has a documented mobility need.
- Confirm inspection points, framing, rough-in, and final, so blocking for grab bars is inspected before the walls close.
Prioritize when the room is too small
If your measurements show the room cannot meet every target, you do not have to remodel everything at once. A common priority order:
- Doorway width, if the chair cannot enter, nothing else matters.
- Toilet transfer space, the fixture used most often, and the hardest to work around.
- Shower access, a curbless entry or a transfer bench solves the biggest daily obstacle.
- Sink knee clearance, important, but often the easiest to solve with a wall-mounted sink later.
Some homeowners borrow space from an adjacent closet or hallway to gain the turning circle; others accept a smaller footprint and rely on a roll-in shower with a folding seat. The right answer depends on the chair's dimensions and the user's transfer style, which is why measurements come first.
Create a Roll-In Shower for Wheelchair Access
A roll-in shower is often the most useful change in an accessible bathroom. To weigh it against a tub, see walk-in shower vs bathtub for elderly safety and accessibility. It lets a wheelchair user roll directly in without stepping over a tub edge, safer and easier than climbing in and out of a tub.
Curbless entry and non-slip flooring
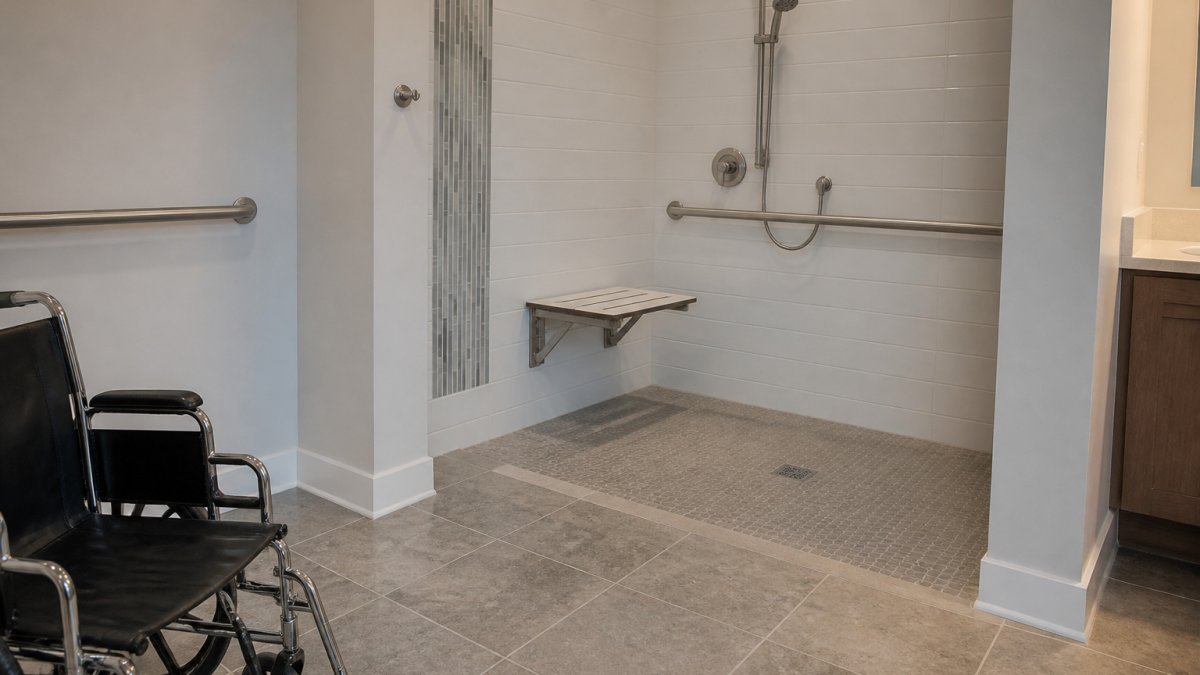
A curbless shower has no raised threshold. The floor slopes gently toward a drain, so water stays in the shower area.
- Slope: A common target is a 1/4-inch fall per foot toward the drain, which keeps water moving without feeling steep underfoot.
- Entry: Keep the shower floor flush with the bathroom floor. If a small curb is unavoidable, keep it to 1/2 inch or less with a beveled edge so a chair can roll over it.
- Drain: A linear drain along the back wall lets you use larger tile and reduces slope planes, making the floor easier to roll across.
Shower seat, handheld showerhead, and reachable controls
A fold-down shower seat gives the user a stable place to sit. Mount it at a height that matches the user's needs, 17 to 19 inches is common, and confirm it holds their weight.
- Install a handheld showerhead on a slide bar so the user can aim water while seated, and add a second mount at seated height.
- Place shower controls within reach from the seat, not behind the user, a common target is 15 to 48 inches above the floor.
- Choose lever handles rather than small knobs, which are harder to grip.
Plan for the user, not a generic layout
A roll-in shower that suits one household may not suit another. Before finalizing the design, answer these questions:
- Chair type: A manual chair and a power chair have different footprints and turning needs. Measure the chair that will actually be used.
- Transfer style: Some users transfer independently from chair to seat; others need a caregiver present. Independent transfers need a seat close to the chair position and sturdy grab bars; assisted transfers need room for a second person beside the seat.
- Bathing preference: Some users shower seated on a bench, others use a shower commode chair and roll in. Match the layout to the routine, not the other way around.
Anchoring and installation details
Grab bars and seats are only as strong as what they are fastened to. Drywall alone cannot hold a person's weight.
- Install solid blocking, typically 2x6 or 2x8 lumber, or plywood, between the studs behind every grab bar and seat location before the walls are closed.
- Fasten bars with the manufacturer's specified screws into the blocking, not drywall anchors.
- Confirm each bar and seat is rated for the load it must carry, and follow the manufacturer's installation instructions exactly.
Test before the job is finished
Test the seat, controls, and showerhead from a seated position before the work is finished, what looks reachable on a drawing may not feel reachable in person. Run the water, check that it drains without pooling, and confirm the floor is not slippery when wet.
Place Grab Bars Where They Will Actually Be Used
Grab bars help with balance and transfers, but only if they sit where the user reaches. In a wheelchair accessible bathroom, a bar placed by habit rather than by how the person moves often goes unused.
Install grab bars:
- Beside the toilet, for a safe sit-down and stand-up.
- Inside the shower, at the entry and along the back wall.
- Near the tub, if one stays in the bathroom.
Mount each bar into solid blocking inside the wall. For help planning these changes, see aging-in-place remodeling services in Central New Jersey. Drywall alone cannot hold a person's weight.
Adjust the Toilet, Vanity, and Storage for Wheelchair Use
The toilet, vanity, and storage must also support easy use from a seated position.
- Toilet: Consider a taller or comfort-height toilet, and leave space on one side for a side transfer.
- Vanity: Choose a sink with knee clearance underneath. Lowering the countertop or choosing a wall-mounted sink can help.
- Storage: Place towel bars, hooks, and shelves within reach. Avoid high cabinets the user cannot open.
Keep controls and supplies in a consistent spot so the user can move around the room with less strain.
Plan Your Accessible Bathroom Remodel With Pioneer Woodwerx
Once you have your measurements, layout, and fixture list, the next step is planning the full project.
At PIONEER WOODWERX, we provide bathroom renovations from first consultation through final installation, with solutions tailored to each home. Pricing depends on the scope of the work.
If you are ready to plan your bathroom remodel, request a free consultation with PIONEER WOODWERX.
Frequently Asked Questions
How do you make a bathroom wheelchair accessible?
Start by measuring doorway width and clear floor space so a wheelchair can enter, turn, and reach fixtures. Then address the high-use features: a curbless or low-threshold shower, grab bars at the toilet and shower, a handheld showerhead, reachable controls, a knee-clearance vanity, and non-slip flooring. Pioneer Woodwerx offers bathroom renovations and free consultations. Pricing depends on the scope of work.
How much space does a wheelchair need in a bathroom?
A wheelchair user needs enough clear floor space to turn around and reach the toilet, sink, and shower. Planning a turning area and keeping the doorway wide enough for the chair are the two most important measurements to take before you design the layout. Measuring the room and the wheelchair itself gives you the numbers to plan the remodel. A consultation with a contractor who works on accessible bathrooms can confirm the specific dimensions your household needs.
Where should grab bars be installed in an accessible bathroom?
Grab bars belong where the user actually reaches for support: beside the toilet, along the shower wall, and near the shower entry. Blocking must be installed inside the wall during construction so the bars hold a person's full weight. Mount bars at a height that matches the user's reach and transfer method, and test them before you finalize placement.
What is a roll-in shower for wheelchair access?
A roll-in shower has no curb or a very low threshold, so a wheelchair can roll directly onto the shower floor. Pair it with a sloped floor that drains well, non-slip tile, a fold-down or fixed shower seat, and a handheld showerhead on a slide bar. Plan the shower size so there is room for the chair and a helper. Contact Pioneer Woodwerx for a free consultation about bathroom renovations.